Aruki panels of drawer box
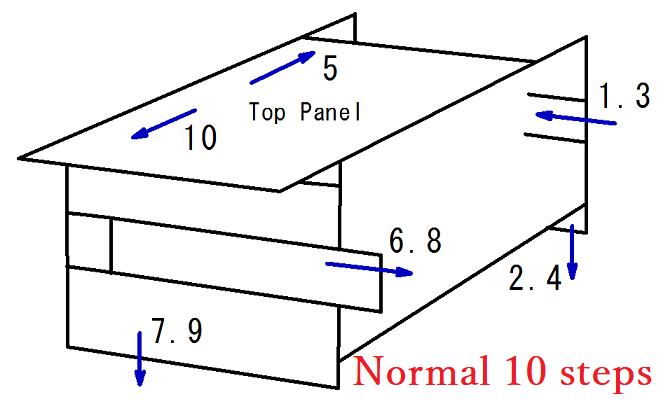
Today, I made the Yosegi panels for the Aruki sides of a 5 sun drawer box. Since this puzzle box requires 10 steps to open, it has Aruki panels on two sides. Typically, the aruki panels on a 10 steps box require 2 steps and 6 steps to move (as shown in the figure). However, this particular drawer box requires 1 step and 6 steps because the drawer at the bottom part uses 2 steps.
In other words, the sequence is: 6 steps (first side panel) + 1 step (top panel) + 1 step (second side panel) + 2 steps (drawer) = Total 10 steps.
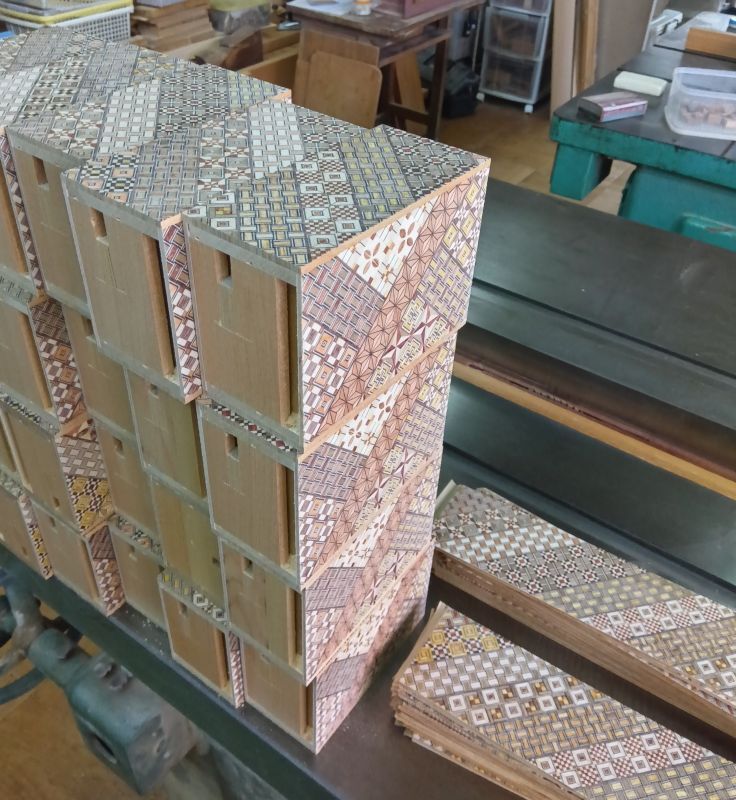
Thus, the first side panel, which requires 6 steps, includes a sliding key (kannuki), while the second side panel, which requires 1 step, is a single board without a sliding key. Normally, the two side panels are attached in separate stages, and I prefer to work on them on different days to allow the glue to harden properly. However, I attached both side panels of this drawer box on the same day in one process because one panel is a single board without a sliding key. The reason I usually cannot attach both panels on the same day is that panels with sliding keys are difficult to attach and require more careful handling. Therefore, I usually attach one panel on a different day.
First, as I mentioned before, I attach a "Bocchi" to the side of the box where the sliding key will be. Then, I grind both sides flat. Next, I make the Yosegi board to be attached. The single board side is a normal square board, but the sliding key side is further divided into thirds (see photo). The joints between the thirds are angled, about 20 degrees. This angle prevents the sliding key from coming off after it is attached and the mechanism is moved. When attaching this side panel, the rubber bands I mentioned yesterday are useful for keeping it in place😊
In other words, the sequence is: 6 steps (first side panel) + 1 step (top panel) + 1 step (second side panel) + 2 steps (drawer) = Total 10 steps.
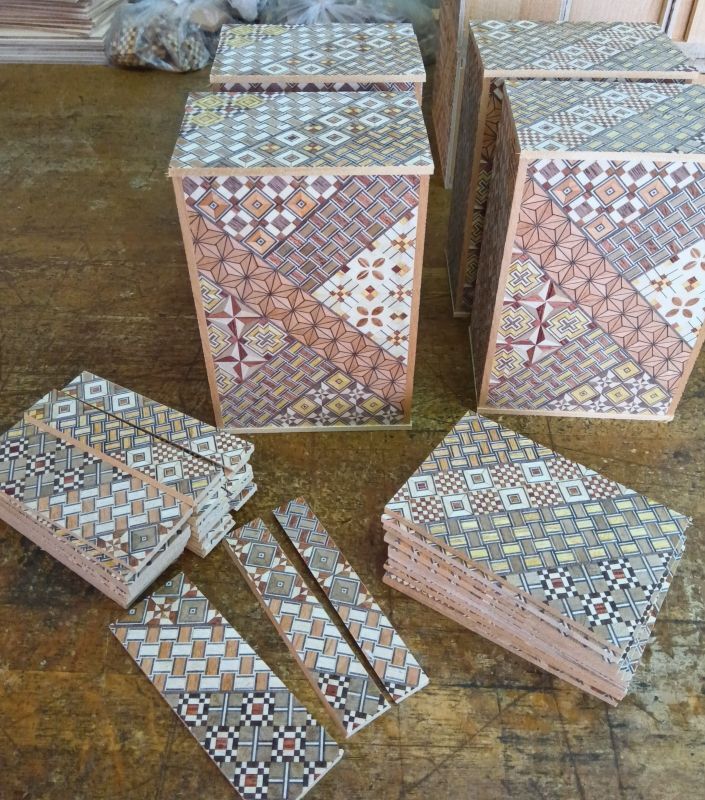
Thus, the first side panel, which requires 6 steps, includes a sliding key (kannuki), while the second side panel, which requires 1 step, is a single board without a sliding key. Normally, the two side panels are attached in separate stages, and I prefer to work on them on different days to allow the glue to harden properly. However, I attached both side panels of this drawer box on the same day in one process because one panel is a single board without a sliding key. The reason I usually cannot attach both panels on the same day is that panels with sliding keys are difficult to attach and require more careful handling. Therefore, I usually attach one panel on a different day.
First, as I mentioned before, I attach a "Bocchi" to the side of the box where the sliding key will be. Then, I grind both sides flat. Next, I make the Yosegi board to be attached. The single board side is a normal square board, but the sliding key side is further divided into thirds (see photo). The joints between the thirds are angled, about 20 degrees. This angle prevents the sliding key from coming off after it is attached and the mechanism is moved. When attaching this side panel, the rubber bands I mentioned yesterday are useful for keeping it in place😊