3-sun Aruki panels
Today, I focused on working on the 3-sun 12-step puzzle box that I started making yesterday. Since the frame panels were already assembled as of yesterday, I attached the necessary parts and made the Aruki panels (moving panels) accordingly. I also cut the solid wood panels for the top and bottom. In the afternoon, I worked on attaching them. Everything went smoothly, and I have already finished attaching the top and bottom panels.
It may seem like I’m rushing, but actually, I have plans tomorrow and won’t be able to work for most of the day. That’s why I wanted to reach this stage and store the box in a case as it is. I will keep it in the case with the top and bottom panels attached and secured with rubber bands.
The rain that lasted until yesterday has ended, and dry weather has returned today. So, the top and bottom panels should continue to dry well in this condition.
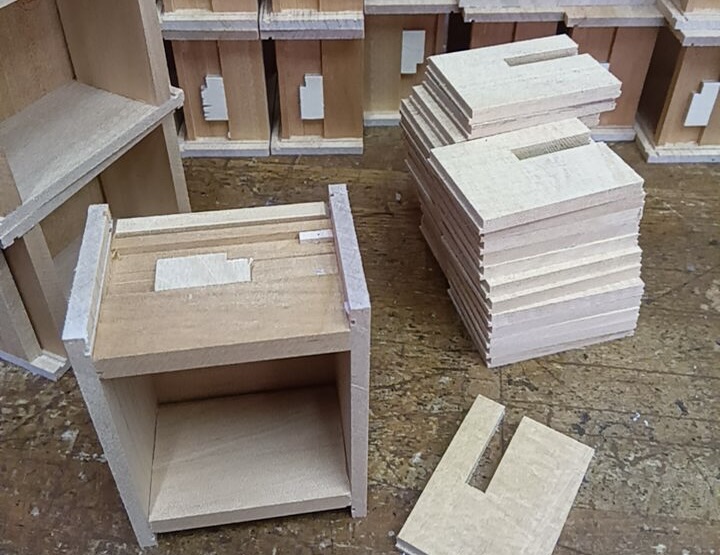
The 3-sun size is made as small as possible, so the material thickness of each part is quite thin. I have to be very careful about the dimensions when making the Aruki panels in this state. The Aruki panel for the lid is 4.5 mm thick, and I used to make the side panels with the same 4.5 mm material. However, this often resulted in the Aruki panels becoming very fragile, breaking frequently when cutting the groove for the Kannuki (slide keys).
This issue occurred when force was applied in the wrong direction while operating the mechanism. For the past few years, I have been making the side Aruki panels with a thickness of 5 mm. Although it may seem like just a small increase of 0.5 mm, this extra thickness greatly enhances the strength of the Aruki. As you can see in the photo, the Aruki panels used for the side panels of the box have a groove that is approximately 6 mm wide and cut partially into them.
The side panels for this box are not ready yet, so my next task will likely be making and attaching the top and bottom panels for the 4.2-sun puzzle box, which also features a solid wood design.
In any case, these panels also need to be thoroughly dried, so I’m hoping for a few more days of sunny weather☀️
It may seem like I’m rushing, but actually, I have plans tomorrow and won’t be able to work for most of the day. That’s why I wanted to reach this stage and store the box in a case as it is. I will keep it in the case with the top and bottom panels attached and secured with rubber bands.
The rain that lasted until yesterday has ended, and dry weather has returned today. So, the top and bottom panels should continue to dry well in this condition.
The 3-sun size is made as small as possible, so the material thickness of each part is quite thin. I have to be very careful about the dimensions when making the Aruki panels in this state. The Aruki panel for the lid is 4.5 mm thick, and I used to make the side panels with the same 4.5 mm material. However, this often resulted in the Aruki panels becoming very fragile, breaking frequently when cutting the groove for the Kannuki (slide keys).
This issue occurred when force was applied in the wrong direction while operating the mechanism. For the past few years, I have been making the side Aruki panels with a thickness of 5 mm. Although it may seem like just a small increase of 0.5 mm, this extra thickness greatly enhances the strength of the Aruki. As you can see in the photo, the Aruki panels used for the side panels of the box have a groove that is approximately 6 mm wide and cut partially into them.
The side panels for this box are not ready yet, so my next task will likely be making and attaching the top and bottom panels for the 4.2-sun puzzle box, which also features a solid wood design.
In any case, these panels also need to be thoroughly dried, so I’m hoping for a few more days of sunny weather☀️